Unused files
Jump to navigation
Jump to search
The following files exist but are not embedded in any page. Please note that other websites may link to a file with a direct URL, and so may still be listed here despite being in active use.
Showing below up to 50 results in range #8,601 to #8,650.
-
 F06H-01-2 WO8-17P@4x.png 175 × 133; 5 KB
-
 F06H-01-4 WO24-1cP@4x.png 452 × 487; 16 KB
-
 F06H-01-2 WO13-1P@4x.png 176 × 178; 5 KB
-
 F06H-01-1 WO7-3aP@4x.png 175 × 133; 4 KB
-
 F06H-01-2 WO8-15aP@4x.png 178 × 133; 7 KB
-
 F06H-01-4 GO20-1@4x.png 262 × 134; 7 KB
-
 F06H-01-4 GO20-2@4x.png 262 × 133; 6 KB
-
 F06H-01-4 GO20-4@4x.png 262 × 133; 6 KB
-
 F06H-01-4 GO20-4a@4x.png 278 × 149; 8 KB
-
 F06H-01-4 WO24-1cP@4x v2.png 176 × 132; 4 KB
-
 Figure 2E-3. Examples of Exit Numbering.png 2,550 × 1,692; 221 KB
-
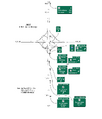
 Figure 2E-4. Example of Interstate Loops and Spurs.png 2,550 × 1,112; 124 KB
-
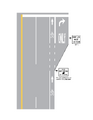
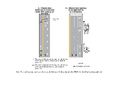
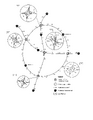 Figure 2E-5. Example of Exit Numbering for Mainline.png 2,550 × 3,300; 303 KB
-
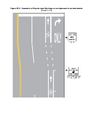
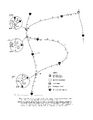 Figure 2E-6. Example of Exit Numbering for.png 2,550 × 3,300; 246 KB
-
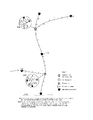 Figure 2E-7. Example of Exit Numbering for.png 2,550 × 3,300; 180 KB
-
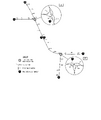 Figure 2E-8. Example of Exit Numbering for Overlapping Routes.png 2,550 × 3,033; 184 KB
-
 Figure 2E-57. Example of a Next Exits Sign E9-3.png 1,072 × 426; 26 KB
-
-
-
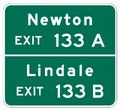
 Figure 2E-55. Example of a Community Exit Identification Sign.png 985 × 599; 37 KB
-
-
 Figure 2E-56. Example of Guide Signs at a Community with 3 or More Exits.png 2,550 × 3,025; 517 KB
-
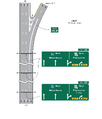
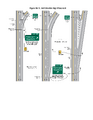 Figure 2E-13. Exit Direction Sign Placement.png 2,550 × 3,300; 259 KB
-
-
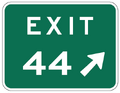
 Figure 2E-15. Exit Gore Signs and Plaques E5-1.png 529 × 432; 10 KB
-
 Figure 903.5.55.png 476 × 599; 147 KB
-
-
 Figure 2E-49 Next Exit Plaques E2-1P.png 1,265 × 225; 14 KB
-
 Figure 2E-49 Next Exit Plaques E2-1aP.png 695 × 332; 14 KB
-
 Figure 2E-15. Exit Gore Signs and Plaques.png 2,550 × 3,300; 79 KB
-

-
-
-
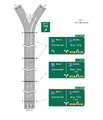
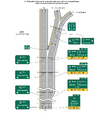 Figure 2E-33. Examples of Guide Signs for a Freeway-to-Freeway Exit (Sheet 1 of 2).png 2,550 × 2,971; 417 KB
-

-
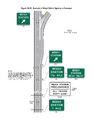 Figure 2E-59. Example of Weigh Station Signing on Freeways.png 2,550 × 3,300; 234 KB
-
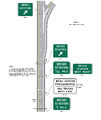 Figure 2E-59. Example of Weigh Station Signing on Freeways v.2.png 2,550 × 3,025; 256 KB
-
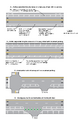
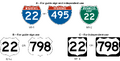 Figure 2E-60 Interstate Off-Interstate and US Route Signs.png 1,867 × 956; 41 KB
-
-
 F09E-03-1.png 2,550 × 3,300; 91 KB
-
 F09E-03-2.png 2,551 × 3,301; 117 KB
-
 F09E-03-3.png 2,550 × 3,300; 109 KB
-
 F09E-04.png 2,551 × 3,301; 119 KB
-
 F09E-06.png 1,895 × 2,903; 181 KB
-
 F09E-07-1.png 2,550 × 3,301; 162 KB
-
 F09E-09.png 2,550 × 1,854; 121 KB
-
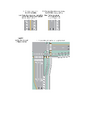
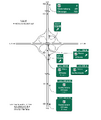 Figure 2E-29. Example of Guide Signs for a Full Cloverleaf Exit.png 2,185 × 2,606; 338 KB
-
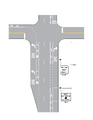
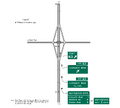 Figure 2E-28. Example of Guide Signs for a Diamond Exit in an Urban Area.png 2,550 × 2,303; 155 KB
-
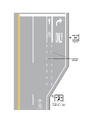
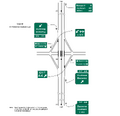 Figure 2E-27. Example of Guide Signs for a Diamond Exit.png 2,550 × 2,458; 197 KB
-


.png)


.png)
.png)


.png)